Have you ever followed a bread recipe to the letter—measured every ingredient, set the oven just right—only to end up with a dense, dry loaf or a sticky mess that refused to shape? Chances are, the culprit wasn’t your technique. It was the hydration.
Hydration—the ratio of water to flour in a recipe—is one of the most powerful yet underrated tools in baking. Most home bakers treat it like a fixed number, but here’s the truth: not all flours absorb water the same way. A 70% hydration sourdough made with all-purpose flour behaves completely differently than one made with whole wheat or rye. And if you’re not adjusting your water levels accordingly, you’re fighting against your ingredients from the start.
In this article, we’ll dive deep into the science and art of customizing hydration for different flours. You’ll learn why protein content, grind size, and even climate affect how much water your flour can handle. We’ll explore practical tips for adjusting recipes on the fly, common mistakes to avoid, and how mastering hydration can transform your baking from inconsistent to exceptional.
Whether you’re a weekend bread enthusiast or someone just starting to experiment with homemade pastries, understanding hydration is a game-changer. So roll up your sleeves—we’re about to get your hands wet (in the best way possible).
1. What Is Hydration, and Why Does It Matter?
At its core, hydration is simply the amount of water in a dough or batter, expressed as a percentage of the flour weight. For example, if a recipe uses 1000 grams of flour and 700 grams of water, that’s a 70% hydration dough.
But hydration isn’t just a number—it’s a behavior. It determines how sticky or firm your dough feels, how easily it rises, and ultimately, the texture of your final product. Too little water, and your bread turns out dry and crumbly. Too much, and it collapses or becomes gummy.
Here’s where most people go wrong: they treat hydration as universal. They see “75% hydration” in a recipe and assume it means the same thing regardless of flour type. But that’s like assuming all sponges absorb water equally—some are dense and thirsty, others light and quick to saturate.
Different flours have different absorption capacities. Whole grain flours, for instance, contain bran and germ, which soak up more water than refined flours. High-protein bread flour absorbs more than low-protein cake flour. Even the brand and milling process can change how a flour behaves.
This means that blindly following a hydration percentage without considering your flour can lead to disappointing results. But once you understand how hydration interacts with flour, you gain control. You stop being a passive follower of recipes and become an active baker who adapts, improves, and creates.
So, the first step to better baking? Recognize that hydration is not static—it’s dynamic, flexible, and deeply personal to your ingredients.
2. How Different Flours Absorb Water: A Closer Look
Let’s break down some of the most common flours and how they interact with water. Understanding these differences will help you adjust hydration intuitively, not just by the numbers.
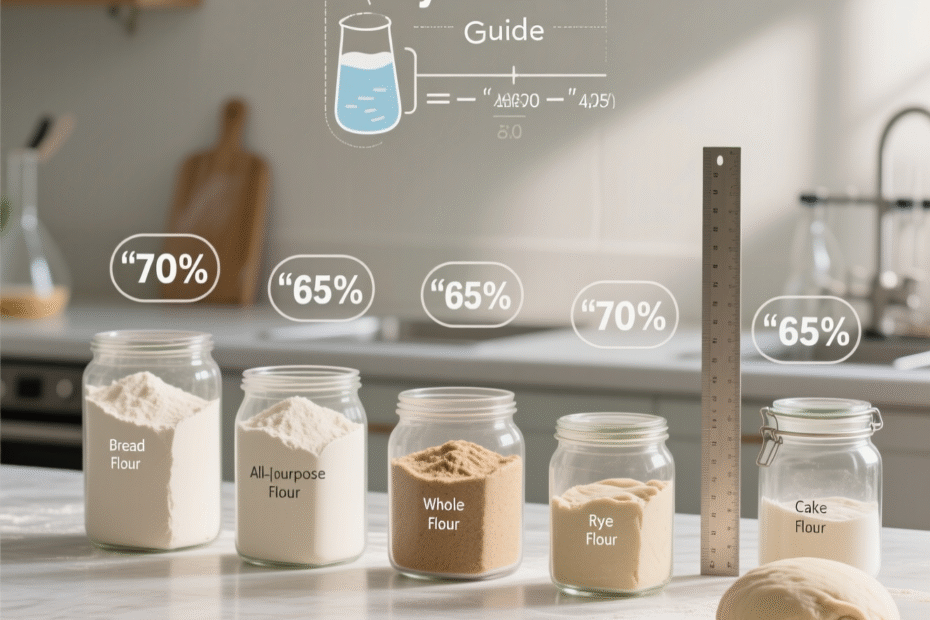
All-Purpose Flour (AP Flour)
- Protein: ~10–12%
- Hydration Range: 55–65%
AP flour is a middle-of-the-road option—moderate protein and moderate absorption. It’s great for everyday baking like sandwich bread or pizza dough. But because it’s refined, it doesn’t hold as much water as whole grain flours. Over-hydrating it can lead to a weak structure and flat loaves.
Bread Flour
- Protein: ~12–14%
- Hydration Range: 65–75%
Higher protein means more gluten development, which allows bread flour to handle more water. This makes it ideal for chewy, open-crumbed artisan breads. You can push hydration higher here, but remember: more water requires stronger gluten networks and proper fermentation.
Whole Wheat Flour
- Protein: ~13–15%
- Hydration Range: 70–80%
Despite similar protein levels, whole wheat absorbs significantly more water due to the bran and germ. These components are like tiny sponges—they soak up moisture and slow gluten development. If you use the same hydration as white flour, your whole wheat bread will be dry and heavy. Adding extra water (and often a longer autolyse) helps create a softer, more elastic dough.
Rye Flour
- Protein: ~8–10%
- Hydration Range: 75–90%+
Rye is a hydration powerhouse. It lacks gluten but contains pentosans—gums that absorb massive amounts of water. Rye doughs are often very sticky and dense. Bakers frequently mix rye with wheat flour to balance structure and moisture retention.
Cake and Pastry Flour
- Protein: ~7–9%
- Hydration Range: 50–60%
These low-protein flours are designed for tenderness. They absorb less water, so high hydration would destroy their delicate texture. Think cakes, muffins, and pastries—where softness is key.
Gluten-Free Flours (e.g., almond, oat, rice)
- Hydration Varies Wildly
Gluten-free flours behave completely differently. Almond flour, for example, is oily and doesn’t absorb water like wheat—it needs binders like eggs or flax. Oat flour soaks up moisture over time, so letting the batter rest is crucial. Each gluten-free flour (or blend) requires its own hydration strategy.
Pro Tip: When switching flours, start with the recipe’s hydration, then adjust during mixing. If the dough feels too dry, add water 1 tablespoon at a time. If it’s too wet, add flour sparingly.
Understanding these differences turns baking from guesswork into a thoughtful, adaptable craft.
3. The Role of Protein and Starch in Water Absorption
To truly master hydration, it helps to understand what’s happening at the microscopic level. Two main components of flour—protein and starch—play starring roles in how water is absorbed and retained.
Protein: The Glue That Holds It All Together
When water meets flour, proteins (mainly glutenin and gliadin) begin to form gluten. This network gives dough its elasticity and strength. Higher protein flours (like bread flour) can absorb more water because they form stronger gluten structures that trap moisture.
But there’s a catch: gluten development takes time and mechanical action (like kneading or folding). If you add too much water too quickly to a high-protein flour without proper development, the dough may feel loose and unmanageable—even if it’s technically well-hydrated.
This is why techniques like autolyse (mixing flour and water and letting it rest before adding salt and yeast) are so effective. During this rest, the flour hydrates evenly, and gluten begins to form naturally, reducing mixing time and improving texture.
Starch: The Hidden Water Sponge
While protein gets most of the attention, starch is quietly doing its part. Starch granules absorb water and swell during mixing and baking. In fact, starch can absorb up to twice its weight in water!
In whole grain flours, the presence of damaged starch (from the milling process) increases water absorption even more. That’s why freshly milled or coarser flours often need more water—they have more surface area and broken starch particles ready to grab onto moisture.
But starch doesn’t just absorb water—it releases it too. During baking, gelatinized starch sets the crumb structure. In cooling bread, starch retrogradation (re-crystallization) can cause staling. Proper hydration slows this process, helping bread stay fresh longer.
The Balance Between Strength and Softness
Think of protein as the scaffolding and starch as the filling. Too much protein without enough water leads to a tough, dry crumb. Too much water without enough protein (or time to develop it) leads to a collapsed loaf.
The sweet spot? Matching hydration to both the flour’s protein content and your desired texture. Want a chewy baguette? Use high-protein flour with 70–75% hydration. Prefer a soft sandwich loaf? Slightly lower hydration with all-purpose flour might be better.
Fun Fact: Flour milled in drier climates often absorbs more water than flour from humid regions—even if it’s the same brand. Environmental factors matter!
By tuning into the science behind protein and starch, you’re not just baking—you’re engineering deliciousness.
4. Environmental and Practical Factors That Affect Hydration
Even if you use the same flour and recipe, your dough can behave differently from day to day. Why? Because hydration isn’t just about flour—it’s also influenced by your environment and technique.
Humidity and Climate
- In dry environments, flour tends to be drier and absorbs more water.
- In humid climates, flour may already contain moisture, so it needs less added water.
A dough that’s perfect in Arizona might be a sticky nightmare in Florida. Seasonal changes can also affect results—many bakers report needing less water in winter and more in summer.
Flour Age and Storage
Older flour loses moisture over time, especially if not stored airtight. It may require slightly more water to achieve the same consistency. Conversely, freshly milled or vacuum-sealed flour retains moisture and may need less.
Mixing Method and Time
Hand-kneading vs. stand mixer vs. no-knead methods all impact hydration perception. A no-knead dough with high hydration (like a 78% sourdough) may seem impossibly wet at first but becomes manageable after bulk fermentation. This is due to gluten development over time.
Similarly, autolyse and fermentation allow flour to fully hydrate. What feels dry at first may become perfectly balanced after a 30-minute rest.
Add-Ins That Change the Game
Ingredients like seeds, nuts, dried fruit, or mashed potatoes absorb water too. If your recipe includes these, you may need to increase hydration by 5–10% to compensate.
For example:
- Sunflower seeds? They’ll soak up water.
- Raisins? They plump up and draw moisture from the dough.
- Olive oil? It coats gluten strands, slightly reducing water absorption.
Practical Tip: When adding dry ingredients, mix them in after the initial autolyse, then adjust water as needed. This prevents uneven absorption.
Being aware of these factors turns you into a responsive baker—one who listens to the dough rather than just following a script.
5. How to Adjust Hydration Like a Pro: Step-by-Step Guide
Now that you understand the why, let’s talk about the how. Here’s a practical, step-by-step approach to customizing hydration for any flour.
Step 1: Know Your Flour
Before you even measure water, ask:
- Is it refined or whole grain?
- What’s the protein content (check the label)?
- Is it fresh or stored for a while?
This gives you a baseline hydration range.
Step 2: Start Slightly Under-Hydrated
When trying a new flour or recipe, hold back 10–15% of the water. Mix the dough, then assess the texture. You can always add more water, but you can’t take it out.
Step 3: Use the Touch Test
After mixing, evaluate the dough:
- Too dry? Cracks form, feels stiff, doesn’t stretch.
- Too wet? Clings to hands, lacks structure, spreads out.
- Just right? Smooth, slightly tacky, holds shape.
This tactile feedback is more reliable than any percentage.
Step 4: Rest and Reassess
Let the dough autolyse for 20–30 minutes. Many flours, especially whole grains, need time to fully absorb water. What felt dry may become perfect after resting.
Step 5: Adjust During Bulk Fermentation
If the dough tightens up or feels too firm after fermentation, you can do a hydration adjustment by adding small amounts of water during stretch-and-folds.
Step 6: Keep a Baking Journal
Record flour type, hydration %, weather, and results. Over time, you’ll build a personal hydration guide tailored to your kitchen.
Example: “King Arthur Whole Wheat, 78% hydration, humid day—needed 5% less water than usual.”
This kind of attention transforms baking from trial-and-error into a repeatable, joyful process.
6. Real-Life Examples: Hydration in Action
Let’s bring this to life with three real baking scenarios.
Case 1: Sourdough with Whole Wheat
You want to make a 50% whole wheat sourdough. The original recipe uses all-purpose flour at 70% hydration.
Mistake: Using 70% hydration with whole wheat.
Result: Dense, dry loaf.
Solution: Increase hydration to 75–78%. Let the flour autolyse for 30 minutes. The bread will be moister, with better oven spring.
Case 2: Gluten-Free Banana Bread
Using a store-bought gluten-free flour blend at the same hydration as wheat flour.
Mistake: Not accounting for different absorption.
Result: Gummy or crumbly texture.
Solution: Reduce liquid slightly or add a binder (like xanthan gum or flax egg). Let the batter rest 10 minutes before baking to allow full hydration.
Case 3: Rye Bread That Holds Its Shape
Trying a 100% rye bread with 80% hydration.
Mistake: Expecting it to behave like wheat dough.
Result: A flat, sticky pancake.
Solution: Use a sourdough starter (which helps structure), mix with wheat flour, or bake in a loaf pan. Accept that rye won’t have the same elasticity.
These examples show that hydration isn’t one-size-fits-all—it’s a conversation between flour, water, and time.
Conclusion: Master Hydration, Master Your Baking
We’ve covered a lot—from the science of protein and starch to real-world adjustments and environmental factors. But the big takeaway is simple: hydration is not a fixed rule. It’s a flexible principle that changes with your flour, your kitchen, and your goals.
By learning how different flours absorb water, you gain the power to adapt recipes, troubleshoot problems, and create breads and baked goods that are consistently delicious. You stop blaming yourself for “failed” bakes and start understanding the subtle language of dough.
So next time you’re mixing a batter or kneading a loaf, ask yourself: Is this flour getting the water it needs? Don’t be afraid to add a splash more or hold back a little. Trust your hands, your eyes, and your instincts.
And remember—every great baker started with a sticky mess or a dry loaf. What sets them apart is curiosity, patience, and the willingness to learn from every batch.
Now, I’d love to hear from you: What’s your biggest hydration challenge? Have you ever had a recipe fail because of the flour? Share your story in the comments—let’s learn together.
And if you found this guide helpful, share it with a fellow baker. Because great bread shouldn’t be a secret—it should be shared, one perfectly hydrated loaf at a time.

Thayná Alves is an influential digital content creator who has carved out a significant space in the realms of technology, finance, and entrepreneurship. Through her blog, Newbacker.com , she stands out as an authentic and accessible voice for individuals seeking practical information about investments, innovation, and emerging trends in the financial market.