There’s something deeply comforting about the smell of fruit bubbling beneath a golden, flaky crust—especially when you didn’t spend hours fussing over it. Enter the fruit galette: the rustic, free-form cousin of the pie that forgives your imperfections and rewards you with stunning results anyway.
Whether you’re a novice baker or a seasoned home cook looking for a low-stress dessert, the galette is your new best friend. In this article, we’ll explore why this humble dessert has captured hearts (and ovens) around the world, how to master it with minimal effort, and why its simplicity is actually its greatest strength.
From choosing the perfect fruit to troubleshooting common pitfalls, you’ll walk away with everything you need to bake a foolproof fruit galette that looks like it came from a Parisian patisserie—even if your kitchen looks more like a flour-covered battlefield. Let’s roll up our sleeves (literally!) and discover how effortless elegance tastes.
Why the Fruit Galette Is the Ultimate Beginner-Friendly Dessert
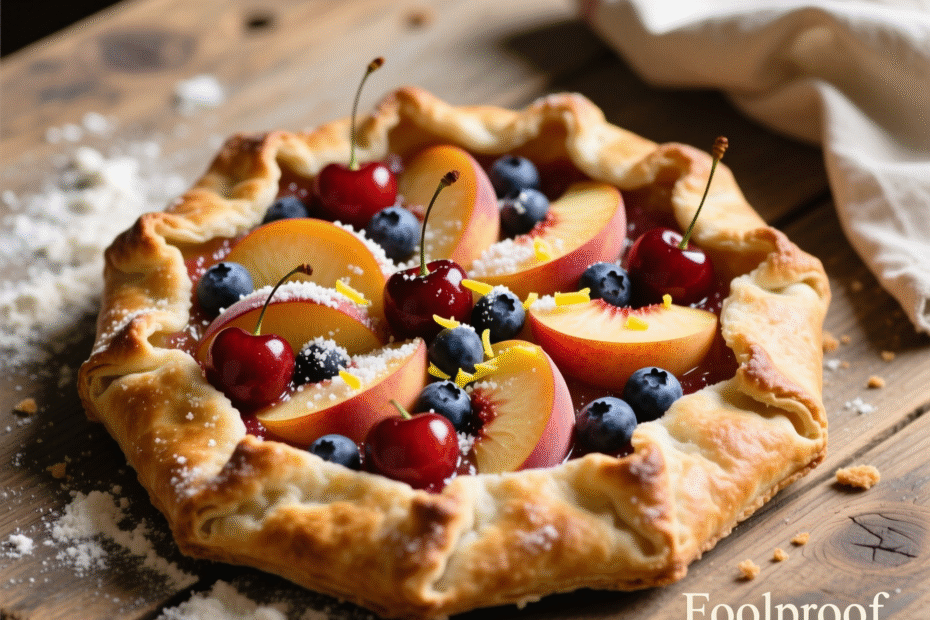
If you’ve ever felt intimidated by pie crusts, lattice tops, or crimped edges, the fruit galette is here to rescue you. Unlike traditional pies that demand precision and perfection, the galette thrives on imperfection. Its charm lies in its rustic appearance—slightly uneven edges, a casually folded crust, and fruit peeking through like it’s waving hello from the oven. This forgiving nature makes it the ideal entry point into the world of baking.
What sets the galette apart is its structure—or rather, the lack of one. There’s no pie dish to wrestle with, no need for blind baking, and absolutely no pressure to achieve Instagram-worthy symmetry. You simply roll out your dough into a rough circle, pile your fruit in the center, fold the edges over, and bake. That’s it. Even if your folds look haphazard or your circle leans more toward “abstract shape,” the result will still be delicious and visually appealing.
Moreover, the galette is incredibly adaptable. Got peaches? Berries? Apples? Pears? Even tomatoes (yes, savory galettes exist!)? They all work beautifully. This flexibility means you can bake seasonally, using whatever is fresh and affordable at your local market. In fact, many professional bakers consider the galette a “pantry dessert”—something you can throw together with minimal ingredients and zero stress.
For beginners, this low barrier to entry builds confidence. One successful galette often leads to another, and before you know it, you’re experimenting with spices, glazes, and crust variations. The galette isn’t just a dessert—it’s a gateway to culinary creativity.
The Secret to a Flaky, Tender Crust (Without the Stress)
Let’s be honest: the crust makes or breaks any fruit dessert. But here’s the good news—you don’t need a pastry degree to nail it. The key to a perfect galette crust lies in three simple principles: cold ingredients, minimal handling, and proper resting.
Start with very cold butter (or a mix of butter and a touch of shortening for extra tenderness). When you cut it into the flour, leave visible pea-sized chunks—these melt in the oven and create steam pockets, giving you that coveted flakiness. Use ice water, just enough to bring the dough together, and resist the urge to overwork it. Every extra knead develops gluten, which leads to toughness instead of tenderness.
Once your dough comes together, wrap it in plastic and let it rest in the fridge for at least 30 minutes. This step is non-negotiable. Resting allows the gluten to relax and the butter to firm up again, making the dough easier to roll and less likely to shrink during baking.
When it’s time to roll, do it on a lightly floured surface or between two sheets of parchment paper—this prevents sticking and eliminates the need for extra flour, which can dry out your crust. Aim for a circle about 12 inches in diameter; don’t worry if it’s not perfect. Remember: rustic is the goal!
A pro tip? Brush the folded edges with a beaten egg or cream before baking. This gives your galette a gorgeous golden sheen that looks professional but takes seconds to do. And if you want to elevate it further, sprinkle the crust with coarse sugar—it adds a delightful crunch and subtle sweetness.
With these straightforward techniques, even first-timers can achieve a crust that’s crisp on the outside, tender within, and worthy of any dessert table.
Choosing the Right Fruit: Seasonality, Texture, and Flavor Balance
Not all fruits behave the same way in a galette—and that’s part of the fun. The beauty of this dessert is that it adapts to the seasons, but choosing the right fruit (and preparing it properly) makes all the difference between a juicy masterpiece and a soggy disappointment.
Summer is prime galette season: peaches, nectarines, plums, berries, and cherries shine. These fruits are naturally sweet and aromatic, requiring little more than a sprinkle of sugar and a pinch of cornstarch or tapioca to absorb excess juices. Berries, in particular, benefit from a light toss with lemon zest to brighten their flavor.
In fall, apples and pears take center stage. Because they’re firmer, they hold their shape beautifully during baking. Slice them thinly and consider adding warming spices like cinnamon, nutmeg, or cardamom for depth. A splash of vanilla or a drizzle of maple syrup can enhance their natural sweetness without overpowering.
Winter might seem less promising, but citrus galettes (using blood oranges or Meyer lemons) or even roasted quince can be stunning. Just be mindful of acidity—balance it with a touch of honey or brown sugar.
One common mistake? Using overly ripe or watery fruit. Overripe berries or mushy peaches release too much liquid, turning your crust soggy. If you must use soft fruit, drain it briefly or increase your thickener slightly. A tablespoon of cornstarch or 1.5 tablespoons of quick-cooking tapioca per 4 cups of fruit usually does the trick.
Also, consider layering flavors. A pinch of salt enhances sweetness. A splash of liqueur (like Grand Marnier with peaches or Amaretto with cherries) adds sophistication. And don’t forget herbs—fresh thyme with plums or rosemary with apples can transform your galette from simple to sublime.
By matching your fruit to the season and balancing texture and flavor, your galette won’t just taste good—it’ll tell a story of time, place, and care.
Common Mistakes (and How to Avoid Them Like a Pro)
Even the most foolproof recipes can trip you up if you overlook a few key details. The good news? Most galette pitfalls are easy to avoid once you know what to watch for.
Mistake #1: A soggy bottom crust.
This is the #1 complaint among galette bakers. The fix? Bake your galette on a preheated baking sheet or pizza stone. The intense initial heat helps set the bottom crust quickly, creating a barrier against fruit juices. You can also brush the dough surface (under the fruit) with a thin layer of egg white or melted jam—this acts as a moisture seal.
Mistake #2: Overfilling the center.
It’s tempting to pile on the fruit, but too much leads to overflow and uneven baking. Stick to about 3–4 cups of sliced fruit for a standard 12-inch galette. Leave a generous 2-inch border for folding—this ensures structural integrity.
Mistake #3: Skipping the thickener.
Even “dry” fruits release liquid as they bake. Always use a thickener like cornstarch, flour, or tapioca. Tapioca gives a clearer, glossier filling, while cornstarch works faster. Don’t skip this step unless you enjoy fruit soup with a side of crust.
Mistake #4: Not letting it cool.
Patience is hard, but cutting into a hot galette guarantees a messy slice. Let it rest for at least 30–45 minutes after baking. This allows the filling to set and the flavors to meld.
Mistake #5: Using warm dough.
If your dough is too soft when you assemble the galette, it’ll tear and become greasy. Keep it chilled until the last moment. If it starts to soften while you work, pop the whole thing in the freezer for 10 minutes before baking.
By sidestepping these common errors, you’ll consistently turn out galettes that are crisp, cohesive, and worthy of proud Instagram posts—even if your kitchen looks like a flour tornado hit it.
Beyond Sweet: Savory Galettes and Creative Twists
While fruit galettes steal the spotlight, the format is just as brilliant for savory applications. Think of the galette as a blank canvas—equally at home with goat cheese and caramelized onions as it is with blueberries and lemon.
Savory galettes are perfect for brunch, light dinners, or elegant appetizers. Try a combination of roasted cherry tomatoes, fresh mozzarella, and basil for a summer showstopper. Or layer sautéed mushrooms, thyme, and Gruyère for a cozy fall version. The same crust principles apply—just omit the sugar and maybe add a pinch of black pepper or herbs to the dough itself.
You can also get creative with your crust. Swap half the all-purpose flour for whole wheat for a nuttier flavor. Add grated Parmesan or a spoonful of pesto to the dough for extra depth. For a gluten-free option, use a quality 1:1 gluten-free flour blend—many bakers report excellent results.
Another fun twist? Mini galettes. Use a 4- or 5-inch cutter to create individual servings—perfect for parties or portion control. They bake faster and look adorable on a dessert platter.
And don’t forget the finishing touches. A drizzle of honey over a ricotta-and-fig galette, a dusting of powdered sugar on a berry version, or a dollop of crème fraîche on the side can elevate your creation from homemade to chef’s kiss.
The galette’s versatility is its superpower. Once you’ve mastered the basic technique, the only limit is your imagination.
Why Baking a Galette Is More Than Just Dessert
In a world of instant meals and pre-packaged treats, taking the time to bake a galette is a quiet act of rebellion—and self-care. It’s a reminder that beauty can emerge from simplicity, that imperfection has its own kind of grace, and that slowing down can be deeply nourishing.
There’s a meditative quality to rolling out dough, arranging fruit, and watching your creation transform in the oven. The process invites presence. You’re not just making dessert—you’re creating a moment of calm in a chaotic day. And when you share that galette with others, you’re offering more than food; you’re offering warmth, effort, and love.
Moreover, the galette teaches resilience. Maybe your first one cracks. Maybe the filling oozes a little too much. But it still tastes wonderful. And next time, you’ll do it better—not because you followed a rigid rulebook, but because you learned by doing.
In many ways, the fruit galette mirrors life: a little messy, deeply flavorful, and far more rewarding when you embrace its natural flow. So the next time you feel overwhelmed by perfectionism—in baking or beyond—remember the galette. Fold the edges loosely. Let the fruit peek through. And trust that good things come from gentle hands and open hearts.
Conclusion: Your Invitation to Bake with Confidence
The foolproof fruit galette isn’t just a recipe—it’s a mindset. It celebrates simplicity, honors seasonality, and welcomes bakers of all skill levels with open, flour-dusted arms. We’ve explored why it’s the perfect beginner dessert, how to craft a flaky crust without stress, how to choose and prepare fruit for maximum flavor, and how to avoid common mistakes. We’ve even ventured into savory territory and reflected on why this humble dish holds deeper meaning in our fast-paced lives.
The truth is, you don’t need fancy tools, expensive ingredients, or hours of free time to create something beautiful and delicious. All you need is a bowl, a rolling pin (or a wine bottle in a pinch!), and a willingness to try. The galette meets you where you are—and rewards you generously for showing up.
So go ahead: preheat your oven, grab whatever fruit looks best at the market, and give it a go. Don’t worry about perfection. Worry about joy. Worry about the smell filling your kitchen, the first warm bite, and the smile on someone’s face when you serve it.
Have you baked a galette before? What’s your favorite fruit combo? Share your stories, tips, or questions in the comments below—we’d love to hear how your rustic masterpiece turned out! And if you found this guide helpful, pass it along to a friend who needs a little baking confidence. Happy baking!

Thayná Alves is an influential digital content creator who has carved out a significant space in the realms of technology, finance, and entrepreneurship. Through her blog, Newbacker.com , she stands out as an authentic and accessible voice for individuals seeking practical information about investments, innovation, and emerging trends in the financial market.