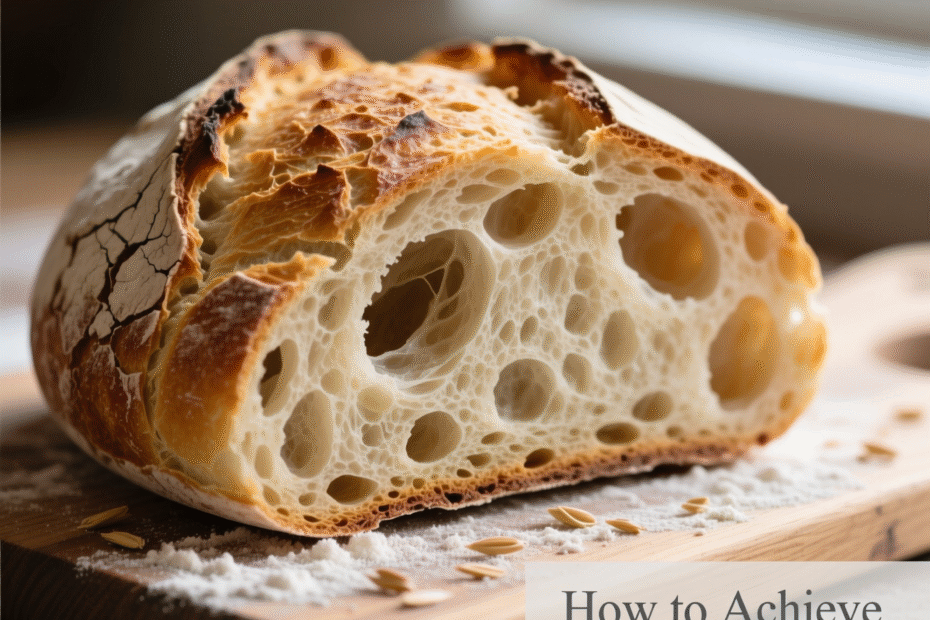
There’s something deeply satisfying about slicing into a freshly baked loaf of bread and revealing a light, airy interior—full of irregular holes, tender strands, and that unmistakable rustic charm. This coveted texture, known as an open crumb, is the hallmark of true artisan bread. But if you’ve ever pulled a dense, tight-crumbed loaf from your oven and wondered what went wrong, you’re not alone. Achieving that perfect open crumb isn’t magic—it’s science, patience, and technique working in harmony.
In this article, we’ll walk you through the essential elements that contribute to an open crumb structure in artisan loaves. From flour selection and hydration levels to fermentation and shaping methods, each step plays a crucial role. Whether you’re a weekend baker or someone just starting your sourdough journey, you’ll walk away with practical, actionable insights to elevate your bread game. Let’s dive into the heart (and holes) of great artisan bread.
1. Flour Matters: The Foundation of Structure and Air
At the heart of every great loaf is the flour you choose—and not all flours are created equal when it comes to achieving an open crumb. The key lies in protein content and gluten strength. Bread flour, with its higher protein content (typically 12–14%), develops a stronger gluten network than all-purpose flour. This network acts like a balloon: it traps the carbon dioxide produced during fermentation, allowing the dough to expand and create those beautiful air pockets.
But here’s a twist: many professional bakers actually blend flours. A mix of bread flour and a small percentage of whole wheat or rye can add flavor complexity while still supporting an open structure—if handled correctly. Whole grain flours absorb more water and can cut gluten strands, so they’re best used in moderation (10–20% of total flour) unless you adjust your technique accordingly.
Tip: Look for unbleached, unbromated bread flour from reputable mills. Freshness matters—older flour loses its enzymatic activity, which affects fermentation and rise.
Also, consider flour’s ash content (a measure of mineral content). European-style flours like Type 00 or T65 often have slightly lower protein but excellent extensibility—ideal for baguettes or ciabatta with dramatic holes. Experimentation is part of the joy, but start with a high-quality bread flour if you’re new to open-crumbed loaves.
2. Hydration Is Your Secret Weapon
If flour builds the skeleton, water gives the dough its soul—and the right amount of water is critical for an open crumb. Hydration refers to the ratio of water to flour by weight (e.g., 75% hydration means 750g water per 1,000g flour). Higher hydration doughs (70% and above) are more fluid, allowing gas bubbles to expand more freely during proofing and baking.
Think of it this way: a stiff dough is like thick clay—it holds shape but resists expansion. A wetter dough is more like soft gelatin—it jiggles, flows, and lets bubbles grow large and irregular. That’s the texture you want for an open crumb.
However, high hydration comes with a learning curve. Sticky doughs are harder to handle, and beginners often add too much flour during mixing or shaping, unintentionally lowering hydration. Don’t fear the stickiness! Use wet hands, a bench scraper, and minimal flour when working with wet doughs.
Practical tip: Start at 70% hydration if you’re new to high-hydration baking. As your confidence grows, push to 75–80% for breads like ciabatta or rustic sourdough. Remember: hydration includes water from your starter or levain, so factor that in when calculating.
3. Fermentation: Time, Temperature, and Patience
Fermentation isn’t just about making dough rise—it’s where flavor develops and gluten matures. Both yeast (commercial or wild) and bacteria produce gases and organic acids that condition the dough, making it more extensible and capable of holding large bubbles.
Long, slow fermentation is your ally. A cold bulk fermentation in the fridge (also called retarding) over 12–24 hours allows enzymes to gently break down starches and proteins, improving dough extensibility without over-oxidizing it. This results in a more open, irregular crumb compared to a quick, warm rise.
But timing matters. Under-fermented dough lacks gas and elasticity; over-fermented dough collapses, losing structure. The sweet spot? Look for dough that’s puffy, jiggly, and holds an indentation when gently poked—but springs back slowly.
Real-life example: Imagine two loaves—one proofed for 2 hours at room temperature, another for 18 hours in the fridge. The slow-fermented loaf will almost always have a more open, complex crumb and deeper flavor. It’s not just tradition; it’s biochemistry working in your favor.
4. Gentle Handling and Minimal Shaping
Here’s a common mistake: treating dough like pizza dough. Over-kneading, aggressive degassing, or tight shaping can destroy the delicate gas bubbles you’ve worked so hard to create during fermentation.
For an open crumb, less is more. During bulk fermentation, perform gentle stretch-and-folds instead of kneading. These folds strengthen gluten without popping bubbles. When it’s time to shape, aim for surface tension without compressing the interior. A loose pre-shape followed by a relaxed bench rest (20–30 minutes) lets the gluten relax, making final shaping easier and less disruptive.
For boules or batards, use a light touch—cup your hands around the dough and rotate it against the counter to create tension on the surface while preserving the airy interior. Avoid using excessive flour during shaping; it dries the surface and inhibits oven spring.
Pro insight: Some bakers skip shaping altogether for ultra-open crumb styles like ciabatta, simply transferring the fermented dough directly onto a floured surface and baking it with minimal disturbance. The result? Massive, irregular holes and a chewy, cloud-like texture.
5. The Power of Steam and Oven Spring
Even with perfect dough, your crumb won’t open fully without a strong oven spring—that dramatic burst of expansion in the first 10 minutes of baking. And oven spring depends heavily on steam.
Steam keeps the crust soft and flexible during the initial bake, allowing the loaf to expand freely. Without it, the crust sets too early, trapping the dough inside and resulting in a denser crumb.
How to create steam at home? Several methods work:
- Dutch oven baking: The enclosed environment traps natural moisture from the dough.
- Ice cubes in a preheated pan: Toss a handful into a cast-iron skillet on the oven floor.
- Spraying the oven walls: Use a spray bottle (carefully!) during the first few minutes.
- Lava rocks or baking steel: These retain heat and help generate consistent steam.
Bonus tip: Score your loaf deeply and confidently. Proper scoring gives expanding gases an escape route, preventing blowouts and encouraging even rise. A lame (bread scoring blade) angled at 30–45 degrees creates an “ear” that lifts beautifully, signaling strong oven spring—and often, an open crumb beneath.
6. Mindset Over Perfection: Embrace the Journey
Finally, achieving an open crumb isn’t just about technique—it’s about mindset. Even experienced bakers have off days. Humidity, flour batch variations, and even your kitchen’s ambient temperature can affect results. Instead of chasing Instagram-perfect loaves, focus on understanding your dough.
Keep a baking journal. Note hydration, fermentation times, room temperature, and outcomes. Over time, you’ll develop intuition—the ability to feel when dough is ready, to adjust on the fly, and to celebrate progress over perfection.
Remember: the most beautiful loaves often come from bakers who’ve embraced failure as part of the process. That slightly dense loaf? It’s still delicious toasted with butter. The one with a collapsed side? Perfect for bread pudding. Every bake teaches you something.
And that’s the real magic of artisan bread: it’s not just food—it’s a practice, a meditation, a connection to centuries of tradition and the simple joy of creating something nourishing with your own hands.
Conclusion: Bake with Intention, Eat with Joy
Creating an open crumb in artisan loaves is equal parts science and soul. From choosing the right flour and mastering hydration to respecting fermentation time and handling dough with care, each step builds toward that light, airy interior we all crave. But beyond the techniques, it’s your patience, curiosity, and willingness to learn that will transform your baking.
Don’t be discouraged by imperfect loaves. Even professional bakers tweak their methods seasonally. What matters is that you’re engaging deeply with the process—and that’s where the real reward lies.
So preheat your oven, dust your counter lightly, and give that high-hydration dough a try. Trust the process, listen to your dough, and savor the journey as much as the crusty, hole-filled result.
Now we’d love to hear from you! Have you struggled with dense crumb? What’s your biggest bread-baking win so far? Share your experiences, questions, or favorite tips in the comments below—let’s build a community of passionate home bakers, one open crumb at a time. And if this guide helped you, don’t forget to share it with a fellow bread lover!

Thayná Alves is an influential digital content creator who has carved out a significant space in the realms of technology, finance, and entrepreneurship. Through her blog, Newbacker.com , she stands out as an authentic and accessible voice for individuals seeking practical information about investments, innovation, and emerging trends in the financial market.