There’s something magical about biting into a slice of freshly baked bread with a perfectly golden crust and an irresistibly airy crumb. But have you ever wondered what goes into creating that ideal texture?
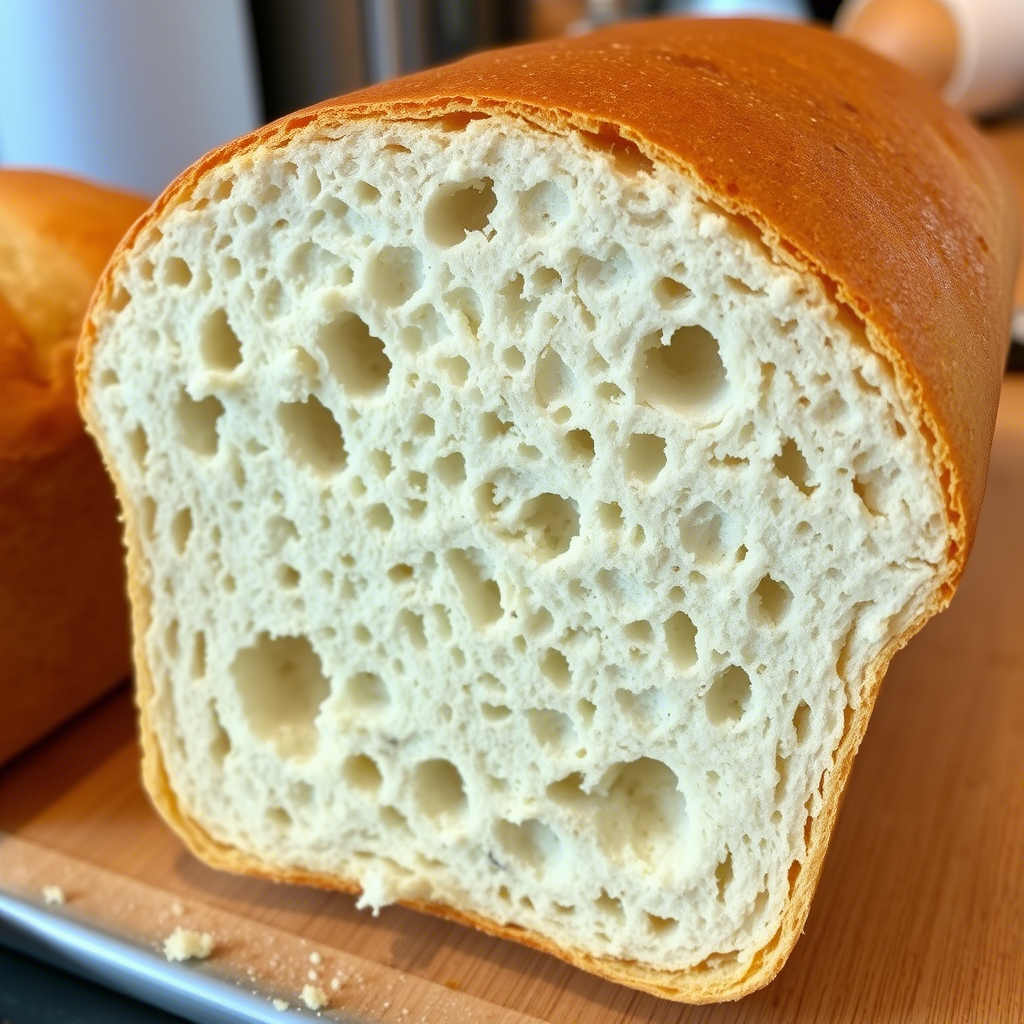
The crumb structure—the soft interior of your loaf—is one of the most critical aspects of great bread baking.
Whether you’re a seasoned baker or just starting out, mastering this skill can elevate your homemade loaves from good to extraordinary. In this article, we’ll explore how to achieve the perfect crumb structure step by step, offering practical tips and inspiration along the way.
Understanding the Importance of Crumb Structure
The crumb structure is more than just aesthetics; it affects taste, texture, and even shelf life. A well-developed crumb means evenly distributed air pockets, a tender bite, and a satisfying chew. On the other hand, a dense or uneven crumb can leave your bread feeling heavy or unappetizing. So, where do you start?
One key factor is gluten development. Gluten forms when flour combines with water, creating a network of proteins that trap gases produced during fermentation.
This process gives the dough its elasticity and strength, allowing it to expand while baking. To ensure proper gluten formation, knead your dough thoroughly—or use techniques like stretch-and-fold if you prefer less hands-on time.
Additionally, choosing high-quality ingredients makes all the difference. For example, bread flour has higher protein content than all-purpose flour, making it ideal for achieving a robust crumb.
Tip: If you’re new to baking, try experimenting with different flours to see how they affect your final product. You might be surprised at the results!
Hydration Levels: Finding Your Balance
Another crucial element in achieving the perfect crumb is hydration. Hydration refers to the ratio of water to flour in your recipe, expressed as a percentage. Higher hydration levels lead to open, holey crumbs typical of artisanal sourdoughs, while lower hydration produces denser, tighter textures. Knowing which type of crumb you want will guide your ingredient choices.
For beginners, aim for a moderate hydration level around 60-70%. This range offers flexibility without being too challenging to handle. As you gain confidence, feel free to experiment with wetter doughs, but remember: wetter doesn’t always mean better. Over-hydrating can result in collapsed loaves or overly sticky doughs that are difficult to shape.
To adjust hydration effectively:
- Start with a basic recipe.
- Gradually add small amounts of water until the dough feels smooth and elastic.
- Let it rest for 20 minutes (autolyse) before proceeding.
This simple technique allows the flour to fully absorb moisture, improving both texture and flavor.
Fermentation: The Heart of Great Bread
Fermentation is the magical transformation that turns raw dough into delicious bread. During this stage, yeast consumes sugars in the dough, producing carbon dioxide gas and alcohol. These bubbles create the air pockets responsible for the crumb’s texture. Proper fermentation depends on three factors: time, temperature, and environment.
Longer fermentation times generally yield better flavors and larger holes in the crumb. However, over-fermenting can cause the dough to collapse, so timing is essential. To control fermentation, consider adjusting the ambient temperature. Cooler environments slow down yeast activity, resulting in deeper flavors and improved structure. Conversely, warmer temperatures speed up the process but may com
If you’re short on time, bulk fermentation (the first rise) can last anywhere from 1 to 4 hours depending on the recipe. For slower, more flavorful development, try overnight refrigeration—a method known as “retarding.” Just make sure to bring the dough back to room temperature before shaping.
Shaping Techniques for Better Results
Once your dough has fermented, shaping becomes vital for maintaining its structure. Poor shaping can deflate those precious air pockets, leading to a flat or dense loaf. Here are some pro tips:
Use gentle hands : Handle the dough carefully to preserve trapped gases.
Tension matters : Create surface tension by folding and rolling the dough tightly. This helps retain its shape during proofing and baking.
Practice makes perfect : Don’t worry if your first attempts aren’t flawless. With practice, you’ll develop muscle memory and confidence.
Additionally, using tools like bannetons (proofing baskets) can help maintain structure and give your loaves professional-looking patterns.
Baking Like a Pro: Steam and Heat
Finally, let’s talk about baking. Oven spring—the initial burst of expansion when bread hits the hot oven—is crucial for developing an open crumb. To maximize this effect, introduce steam during the early stages of baking. Steam keeps the crust flexible, allowing the loaf to expand fully before hardening.
Here’s how to add steam:
- Place a shallow pan filled with boiling water on the bottom rack of your oven.
- Alternatively, spray the walls of the oven with water using a misting bottle.
After about 15 minutes, reduce humidity to allow the crust to crisp up. Meanwhile, ensure your oven reaches the correct temperature—usually between 425°F and 475°F (220°C–245°C). Preheating your baking stone or Dutch oven also enhances heat transfer, promoting uniform baking.
Inspiration Through Practice
Achieving the perfect crumb structure takes patience, persistence, and a willingness to learn. Every failed loaf teaches valuable lessons, and every success reinforces your skills.
Remember, baking is both science and art. By understanding the principles behind gluten development, hydration, fermentation, shaping, and baking, you’ll unlock endless possibilities.
Consider joining online communities or attending local workshops to connect with fellow enthusiasts. Sharing experiences and tips can inspire creativity and deepen your passion for bread making. And don’t forget to savor each loaf—not only for its taste but for the joy of creation.
Conclusion
Creating the perfect crumb structure in bread involves balancing several elements: gluten, hydration, fermentation, shaping, and baking.
Each step plays a role in determining the final outcome, whether you’re aiming for fluffy sandwich bread or rustic sourdough. By following these guidelines and embracing experimentation, you’ll soon master the craft of bread baking.
So why not grab your apron and get started today? Leave a comment below sharing your favorite bread recipe or ask questions—we’d love to hear from you! Happy baking, and remember: perfection comes one loaf at a time.

Thayná Alves is an influential digital content creator who has carved out a significant space in the realms of technology, finance, and entrepreneurship. Through her blog, Newbacker.com , she stands out as an authentic and accessible voice for individuals seeking practical information about investments, innovation, and emerging trends in the financial market.
