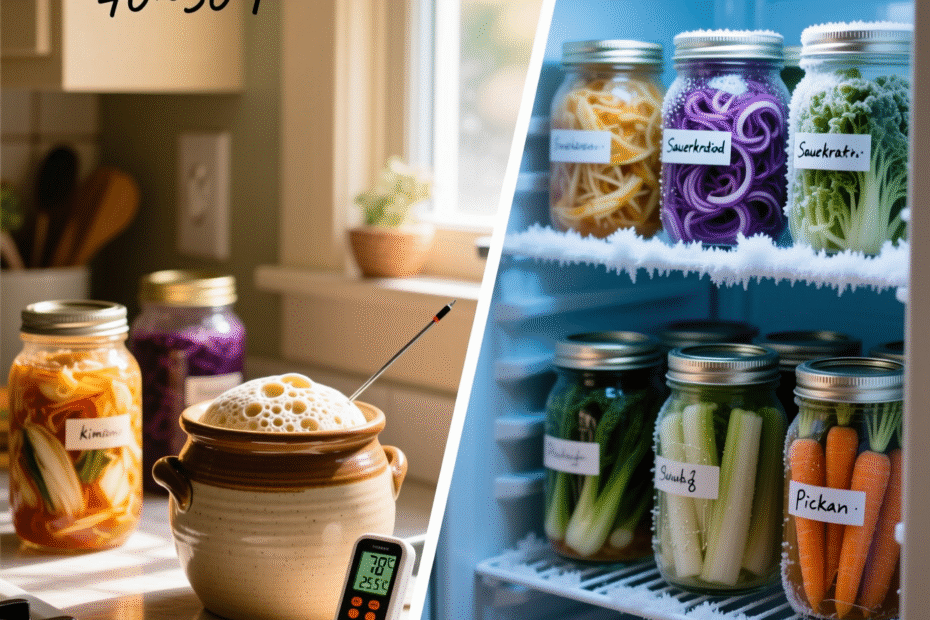
Have you ever pulled your sourdough starter from the counter only to find it bubbling over like a science experiment gone wild—or worse, barely alive after a chilly night? If so, you’re not alone. Fermentation is a beautiful, living process, but it’s also incredibly sensitive to its environment. Whether your kitchen feels like a tropical greenhouse in summer or a walk-in fridge in winter, temperature plays a starring role in how your ferments behave.
This article is your practical guide to mastering fermentation no matter what your kitchen throws at you. We’ll explore why temperature matters so much, how to recognize signs of imbalance, and—most importantly—how to adapt your methods to keep your cultures happy, healthy, and productive. From sourdough and kombucha to yogurt and kimchi, controlling fermentation in extreme temperatures isn’t just possible—it’s empowering. By the end, you’ll have a toolkit of low-cost, easy-to-implement strategies that work whether you’re baking in Miami or fermenting in Minneapolis. Let’s dive in and turn your kitchen into a fermentation-friendly zone, all year round.
Why Temperature Is the Secret Ingredient in Fermentation
Fermentation isn’t just about mixing ingredients—it’s about creating the perfect home for trillions of tiny microbes. Yeasts, bacteria, and molds are the unsung heroes behind your tangy sauerkraut, fluffy sourdough, and fizzy kefir. But like any living thing, they thrive within specific temperature ranges.
Most common fermentation cultures—like *Lactobacillus* (used in yogurt and pickles) or *Saccharomyces cerevisiae* (the yeast in bread and beer)—prefer a cozy 68°F to 78°F (20°C to 25°C). Go much above or below that, and things get tricky. In warm kitchens (above 80°F/27°C), fermentation speeds up dramatically. Your dough might double in an hour, but it can over-ferment quickly, leading to sour, collapsed loaves or overly acidic ferments. On the flip side, cold kitchens (below 65°F/18°C) slow microbial activity to a crawl. A sourdough starter that normally peaks in 6 hours might take 12—or more—leaving you waiting and wondering if it’s still alive.
This sensitivity isn’t just theoretical. Home fermenters often report inconsistent results simply because their kitchen temperature shifts with the seasons. One baker in Arizona shared how her summer loaves turned gummy and flat, while her winter batches barely rose. The culprit? Uncontrolled ambient heat. Understanding this relationship between microbes and temperature is the first step toward predictable, delicious results—no matter the weather.
Taming the Heat: Fermenting Successfully in Warm Kitchens
If your kitchen feels like a sauna by midday, don’t panic—you can still ferment like a pro. The key is slowing things down just enough to give your microbes time to work without burning out.
Start by **choosing cooler spots** in your home. Basements, interior closets, or even a shaded corner away from windows and appliances can be several degrees cooler than your main counter. Another trick? **Use cooler water** when mixing dough or starter. Instead of room-temperature water, try chilled or even ice water to lower the initial dough temperature. For sourdough bakers, this simple swap can add precious hours to bulk fermentation.
You can also **shorten fermentation times** and monitor closely. Set timers, take notes, and check your ferments every hour or two. Look for visual cues: a 30–50% rise in dough, gentle bubbles in kombucha, or a pleasant tang in yogurt—not sharp acidity.
For extra control, consider a **proofing box** or **fermentation chamber**. These don’t have to be expensive—a cooler with a jar of warm water and a thermometer works wonders. Or repurpose a small insulated lunch bag with a heating pad set on low (use a thermometer to avoid overheating).
**Bonus tip**: In very hot climates, try fermenting overnight in the fridge for part of the process. A “cold ferment” slows yeast activity while allowing flavor-building bacteria to work slowly—ideal for complex sourdough or mellow kimchi.
By managing heat proactively, you turn a challenge into an advantage: faster ferments mean more batches in less time—just with a little extra attention.
Keeping Things Cozy: Reviving Fermentation in Cold Kitchens
Cold kitchens can feel like a fermentation desert—everything moves at a glacial pace. But with a few clever hacks, you can create a warm microclimate without cranking up the whole house heater.
One of the simplest solutions? **The oven trick**. Turn on your oven light (not the heat!) and place your ferment inside. The incandescent bulb often raises the temperature by 5–10°F (3–6°C), creating a gentle, consistent warmth. Just be sure to check your oven manual—some modern LED-lit ovens won’t generate enough heat.
Another favorite among home fermenters is the **heating pad method**. Place your jar or bowl on a low-setting heating pad, wrap it in a towel for insulation, and monitor with a thermometer. This works especially well for yogurt, which needs a steady 110°F (43°C) to culture properly.
Don’t overlook **body heat** as a resource. Some bakers tuck their dough into a turned-off dishwasher (which stays warmer than the room) or even sleep with their starter under the covers! While that last one might sound extreme, it highlights a key principle: fermentation doesn’t need high heat—just consistent, mild warmth.
Also, **use warmer water** in your mixes. If your tap water is icy, heat it slightly (to around 85°F/29°C for sourdough) before adding it to flour or cultures. This jump-starts microbial activity without shocking the system.
Remember: patience is your ally in cold weather. Slower ferments often develop deeper, more nuanced flavors. Many artisan bakers actually prefer cool, slow rises for their complex taste profiles. So while it may take longer, the results can be worth the wait.
Smart Tools and Low-Tech Hacks for Temperature Control
You don’t need a lab-grade incubator to control fermentation—some of the best solutions are surprisingly simple and budget-friendly.
A **digital thermometer with a probe** is worth its weight in gold. Stick it into your dough or hover it near your fermenting jar, and you’ll know exactly what’s happening. Pair it with a **hygrometer** if you’re making dry-cured ferments like salami, where humidity also matters.
For consistent warmth, consider a **seedling heat mat**—designed for sprouting plants but perfect for yogurt or kombucha. They maintain a steady 70–85°F (21–29°C) and cost under $25. Place your jar on the mat, cover it with a cardboard box for insulation, and voilà: a DIY fermentation station.
On the low-tech side, **insulated containers** work wonders. A Styrofoam cooler, a thick wool blanket, or even a cardboard box lined with towels can trap ambient heat. Add a warm water bottle inside for extra warmth in winter, or a frozen gel pack in summer to cool things slightly.
**Thermal mass** is another underused trick. Place a jar of warm (not hot) water next to your ferment. The water releases heat slowly, buffering against temperature swings. This is especially helpful in drafty kitchens or rooms with fluctuating temps.
And don’t forget your **oven or microwave**—when not in use, they’re excellent insulated chambers. Just remember: never turn on the heat unless you’re certain your ferment can handle it!
These tools aren’t about perfection—they’re about creating stability. Even a 5°F difference can mean the difference between a failed batch and a showstopper loaf.
Reading the Signs: How to Know When Your Ferment Is Happy (or Stressed)
Temperature control isn’t just about setting a number—it’s about listening to your ferment. Microbes communicate through bubbles, smells, textures, and timing. Learning their language is half the battle.
A **healthy sourdough starter** at the right temperature will double in 4–8 hours, smell fruity or mildly tangy, and have a mousse-like texture. If it’s rising too fast and smells like vinegar or acetone, it’s too warm. If it barely moves after 12 hours and smells flat, it’s too cold.
**Kombucha** should develop a new SCOBY layer and a pleasant tartness in 7–10 days. In heat, it may over-ferment into vinegar in just 4–5 days. In cold, it might stay sweet and weak for weeks. Taste it every few days—your palate is your best guide.
**Yogurt** should thicken evenly and taste mildly tangy after 6–12 hours. If it’s runny, the temperature likely dipped too low. If it’s grainy or separates, it got too hot.
**Kimchi and sauerkraut** bubble actively in the first few days. In warm temps, they may ferment in 3–5 days; in cold, up to 3 weeks. Watch for mold (a sign of contamination, not just cold) and always ensure veggies stay submerged under brine.
**Trust your senses**. If something smells foul (not just sour), looks slimy, or shows colorful mold, discard it. But if it’s just slow or fast? Adjust your environment and try again. Fermentation is forgiving—especially when you’re paying attention.
Embracing Seasonal Fermentation: Working With Nature, Not Against It
Instead of fighting your kitchen’s natural rhythm, what if you leaned into it? Seasonal fermentation isn’t just practical—it’s deeply traditional. Our ancestors didn’t have thermostats, yet they fermented year-round by adapting to the climate.
In summer, focus on **fast, cool ferments**: quick pickles, water kefir, or thin-crust pizza dough that benefits from a rapid rise. The warmth becomes your ally, not your enemy.
In winter, shift to **slow, flavor-rich projects**: long-fermented sourdough, aged cheeses, or miso that deepens over months. Cold slows things down, but it also allows complex flavors to develop—think of it as nature’s aging process.
You can even **plan your ferments around your home’s microclimates**. Notice which rooms stay warmest in winter (near radiators?) or coolest in summer (north-facing pantry?). Rotate your projects accordingly.
This mindset reduces stress and increases success. You’re not battling your environment—you’re collaborating with it. Plus, there’s a quiet joy in eating a loaf of bread that reflects the season it was made in: light and airy in July, deep and earthy in January.
By syncing your fermentation rhythm with the natural world, you honor an ancient practice while enjoying better-tasting, more resilient results.
Conclusion
Controlling fermentation in warm or cold kitchens isn’t about achieving laboratory precision—it’s about understanding your environment and working with it creatively. We’ve explored why temperature matters so deeply to microbial life, how to cool things down in summer heat, how to add gentle warmth in winter chill, and the simple tools and hacks that make a real difference. Most importantly, we’ve learned to read the signs our ferments give us and to embrace the natural rhythm of the seasons.
Whether you’re a beginner just starting your first jar of kombucha or a seasoned sourdough baker troubleshooting winter loaves, these strategies put you back in control. Fermentation is resilient, forgiving, and endlessly adaptable—just like you.
So the next time your kitchen feels too hot or too cold, don’t see it as a barrier. See it as an invitation to experiment, observe, and connect more deeply with the living process in your hands.
**Now it’s your turn**: What’s your biggest fermentation challenge right now? Have you tried any of these tricks? Share your experiences, questions, or favorite seasonal ferments in the comments below—we’d love to hear from you! And if this guide helped you, why not share it with a fellow fermenter? Happy fermenting!

Thayná Alves is an influential digital content creator who has carved out a significant space in the realms of technology, finance, and entrepreneurship. Through her blog, Newbacker.com , she stands out as an authentic and accessible voice for individuals seeking practical information about investments, innovation, and emerging trends in the financial market.