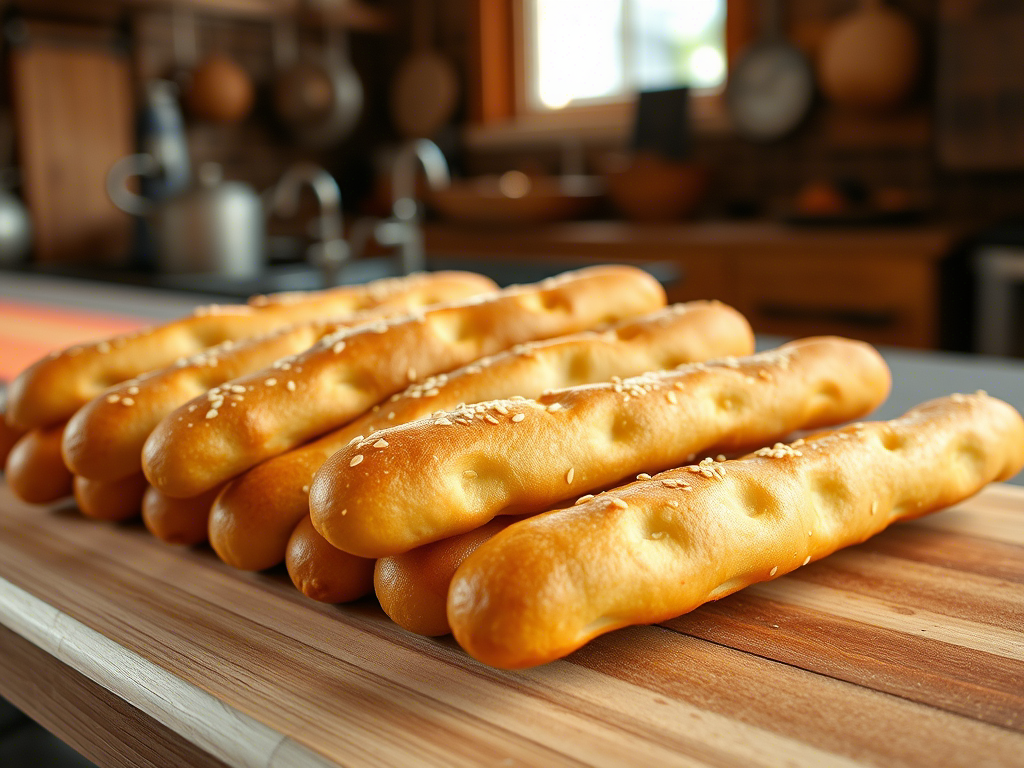
Who doesn’t love a warm, crispy breadstick fresh out of the oven? Whether you’re hosting a casual get-together or simply craving an easy snack to pair with your favorite dip, breadsticks are a versatile and satisfying choice.
But here’s the good news: they don’t have to come from a store or restaurant! With just a few basic ingredients and minimal effort, you can make delicious homemade breadsticks that rival any pre-packaged option. Not only is this method cost-effective, but it also allows you to customize flavors according to your taste preferences.
In this article, we’ll explore why making simple breadsticks at home is such a great idea. We’ll cover everything from understanding their appeal to providing step-by-step instructions for creating them yourself. By the end of this guide, you’ll be inspired to whip up a batch of these delightful treats in no time. Let’s dive in!
Why Homemade Breadsticks Are Worth Your Time
One of the most compelling reasons to make breadsticks at home is convenience. Store-bought versions often contain preservatives and additives that may not align with your dietary goals. On the other hand, homemade breadsticks give you complete control over what goes into them—allowing you to keep things healthier while still savoring all the flavor.
Additionally, preparing breadsticks yourself is surprisingly straightforward. You won’t need fancy equipment or hours of prep time; instead, a basic dough recipe combined with some patience will yield fantastic results. This simplicity makes breadstick-making perfect for beginners who want to experiment with baking without feeling overwhelmed.
For instance, did you know that many breadstick recipes require only four main ingredients? Flour, yeast, water, and olive oil form the foundation of most doughs, meaning even those on tight budgets can afford to try this project. Plus, once you master the basics, you can experiment with herbs, spices, cheeses, and garlic butter to elevate your creations further.
The Benefits of Making Your Own Snacks
Snacking has become a staple part of our daily lives, whether during work breaks, study sessions, or movie nights. However, relying solely on packaged snacks can lead to unwanted consequences like excessive sugar intake or unhealthy fats. That’s where homemade options shine—they allow you to enjoy guilt-free munching while knowing exactly what you’re eating.
Homemade breadsticks offer numerous advantages beyond health benefits. For one, they save money compared to buying similar items at grocery stores or restaurants. Imagine serving freshly baked breadsticks at your next dinner party instead of opting for expensive appetizers. Guests will appreciate both the gesture and the quality of your homemade goods.
Moreover, involving family members or friends in the process adds another layer of enjoyment. Baking together fosters creativity and strengthens bonds through shared experiences. Children especially love rolling out dough and sprinkling toppings, turning meal preparation into a fun activity rather than a chore.
Step-by-Step Guide to Making Simple Breadsticks
Now let’s walk through how to create your own breadsticks using a foolproof recipe. Follow these steps closely, and you’ll soon be enjoying golden brown sticks bursting with flavor.
Ingredients:
- 2 cups all-purpose flour
- 1 packet (or 2¼ teaspoons) active dry yeast
- ¾ cup warm water (about 110°F/45°C)
- 1 tablespoon sugar
- 1 teaspoon salt
- 2 tablespoons olive oil, plus extra for brushing
- Optional toppings: shredded Parmesan cheese, dried oregano, minced garlic, coarse salt
Instructions:
Activate the Yeast : In a small bowl, dissolve the sugar in the warm water. Sprinkle the yeast over the surface and let it sit for about 5 minutes until frothy. This step ensures the yeast is alive and ready to work its magic.
Mix the Dough : Combine the flour and salt in a large mixing bowl. Add the activated yeast mixture and olive oil. Stir until a shaggy dough forms, then knead by hand or use a stand mixer fitted with a dough hook for 5–7 minutes. The dough should feel smooth and elastic when finished.
Let It Rise : Place the dough in a lightly oiled bowl, cover it with a damp cloth, and set aside in a warm spot for approximately 1 hour. During this time, the dough will double in size as the yeast ferments and produces gas bubbles.
Shape the Breadsticks : Punch down the risen dough to release trapped air. Divide it into equal portions (around 12 pieces), and roll each piece into a long, thin strip. Arrange the shaped breadsticks onto a greased baking sheet.
Top and Bake : Brush the tops generously with olive oil and sprinkle desired toppings evenly across the surface. Preheat your oven to 400°F (200°C) and bake for 12–15 minutes, or until golden brown.
Customizing Your Breadsticks
Once you’ve mastered the basic recipe, the possibilities for customization are endless. Here are a few ideas to inspire your culinary adventures:
Cheese Lovers Delight : Mix grated mozzarella, cheddar, or Parmesan directly into the dough before shaping.
Herb Infusion : Fold chopped rosemary, thyme, or basil into the dough for added fragrance and depth.
Garlic Kick : Spread softened butter mixed with minced garlic over the breadsticks after baking for an irresistible aroma.
Sweet Twist : Swap savory seasonings for cinnamon-sugar coating to transform breadsticks into dessert-worthy treats.
Experimentation encourages innovation, so don’t hesitate to test unique combinations based on your palate.
Tips for Perfect Results Every Time
Even though breadstick-making is relatively uncomplicated, certain techniques ensure consistent success. Below are some pro tips to refine your skills:
Temperature Matters : Always measure liquid temperatures carefully since yeast thrives within specific ranges. Too cold, and it won’t activate properly; too hot, and it could kill the yeast entirely.
Kneading Technique : Proper kneading develops gluten structure, which gives breadsticks their signature chewiness. If unsure, aim for a soft yet firm consistency.
Resting Time : Allowing sufficient rising time enhances texture and flavor development. Rushing this phase leads to dense, flat outcomes.
Storage Solutions : Keep leftover breadsticks fresh by storing them in an airtight container at room temperature. Reheat briefly in the oven if needed.
By adhering to these guidelines, you’ll achieve professional-quality results consistently.
How Breadsticks Fit Into Modern Diets
Today’s consumers increasingly prioritize wellness-conscious choices, seeking snacks that satisfy cravings without compromising nutrition. Fortunately, breadsticks fit neatly into this paradigm when prepared thoughtfully. Using whole wheat flour instead of refined alternatives boosts fiber content, while reducing added sugars promotes balanced blood sugar levels.
Vegetarians and vegans alike can relish breadsticks tailored to their lifestyles. Substituting dairy-based toppings with plant-based alternatives maintains authenticity while catering to diverse dietary restrictions. Furthermore, gluten-free flours enable individuals with sensitivities to indulge safely.
Ultimately, breadsticks exemplify adaptability—they meet modern demands for flexibility and personalization.
Conclusion
Making simple breadsticks at home represents more than just a tasty endeavor—it embodies creativity, frugality, and mindfulness. From enhancing flavor profiles to fostering meaningful connections, there’s something inherently rewarding about crafting food with care. As you embark on this journey, remember that practice refines perfection. Don’t shy away from trial and error—it’s all part of the learning curve.
To recap, we discussed why homemade breadsticks are advantageous, provided a detailed recipe, explored customization opportunities, and offered practical advice for achieving ideal results. Now it’s your turn to take action! Will you attempt the classic version first or jump straight into experimenting with new twists?
Feel free to share your thoughts below. What was your favorite topping combination? How did your breadsticks turn out? Engaging with fellow enthusiasts amplifies the joy of discovery. Happy baking!

Thayná Alves is an influential digital content creator who has carved out a significant space in the realms of technology, finance, and entrepreneurship. Through her blog, Newbacker.com , she stands out as an authentic and accessible voice for individuals seeking practical information about investments, innovation, and emerging trends in the financial market.
